

Windows 10 Pro and Enterprise versions include the ability to run the Hyper-V hypervisor at no additional charge. While these versions of Windows may include Hyper-V support, that doesn’t mean that your computer can fully support Hyper-V. Most modern CPU’s will support hardware virtualization nowadays, but these options may need to be enabled in the BIOS before they can be used.
You can check to see if your Windows 10 computer is capable of running Hyper-V by following the steps below.
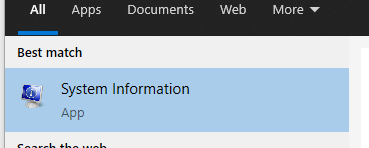
Press the start button and type “system information”, and click the “System Information” shortcut which should be shown as per the below screenshot.
or
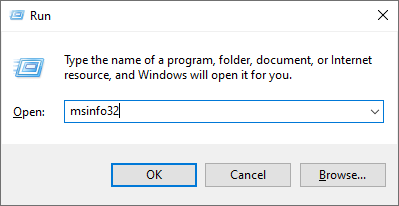
Press the windows key on the keyboard, and the “r” key at the same time, to bring up the “Run” dialog window. Type in “msinfo32” and press enter or click “OK”.
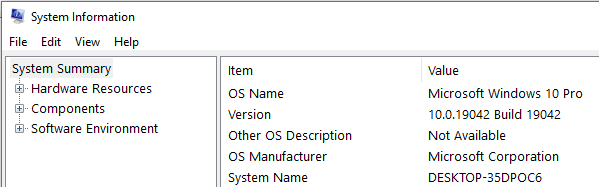
This should launch the “System Information” window and look something like this:
While “System Summary” is selected, scroll down on the right hand pane, until you get to the “Hyper-V” options (generally all the way at the bottom).
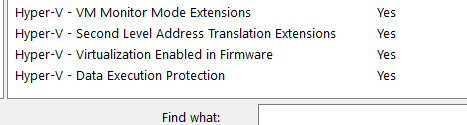
As you can see in the example above, there are 4 Hyper-V items that you need to focus on.
- Hyper-V – VM Monitor Mode Extensions
- Hyper-V – Second Level Address Translation Extensions
- Hyper-V – Virtualization Enabled in Firmware
- Hyper-V – Data Execution Protection
If these all say “Yes” as per the above example, you are good to go, and your Windows 10 computer fully supports Hyper-V.
If any of these 4 items have a value of “No”, you may need to check your BIOS settings to ensure that the relevant virtualization options (if available) are enabled. If all the virtualization options in the BIOS are already enabled, and you still get ‘No’ values appearing, your PC may not support Hyper-V.