If you have your display’s DPI (Dots Per square Inch) setting set to something greater than 96 DPI (which is the default) in Windows XP, you may find that some applications don’t display text/form elements correct, and may get cut off the screen. Changing the DPI back to 96, and rebooting, should fix this issue in most scenarios. Having a larger DPI setting means the fonts and form elements will be larger, so it can assist if you have trouble viewing the screen using the lower DPI settings.
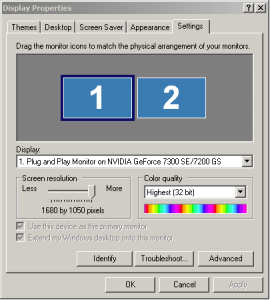
To change the DPI setting, bring up the “Display Properties” screen and go to the Settings tab.
The display properties screen can be accessed by opening the ‘Display’ item in the control panel, or you can right click some blank space on the desktop, and select ‘Properties’.

Click on the “Advanced” button.
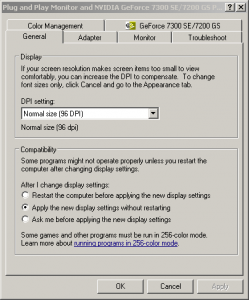
Click on the “General” tab if it is not automatically selected.

Change the DPI drop down setting back to 96 DPI (or change it to whatever you want).
Hit “OK” to confirm the changes.
Hit “OK” again to close out of the display properties screen.
You will need to restart your computer for these changes to take effect. Your DPI setting should now be changed, and if you had applications that were playing up on the old DPI setting, they should now hopefully work/appear correctly.

