If you don’t have a RAID add-on card (or have RAID capabilities on your motherboard), but you would still like to have some level of redundancy due to hard disk failure, you can set up a software RAID1 array. RAID1, otherwise known as mirroring, simply duplicates all writes to one drive, to another. If one drive fails, you can simply recover using the other.
This is done at a low level, so you wont see two drive letters in windows. You will simply see the one drive letter, and all writes that are performed on that drive are automatically synced to the other.
This guide will outline how to set up RAID1 mirroring on Windows 2008 Server.
Configuring your drives
Make sure that you have a second hard disk the same size, or larger than the one you want to mirror.
Start by opening up “Computer Management” located under “Administrative Tools”.
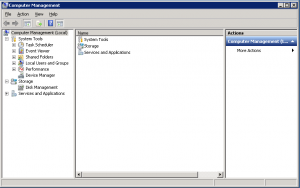
Click on the “Disk Management” feature located under “Storage” on the tree menu.
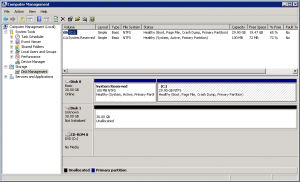
If your disk is new/completely blank, there will be no partitions currently set up. If this is the case, you may automatically get asked to Initialize the disk, as per the image below.
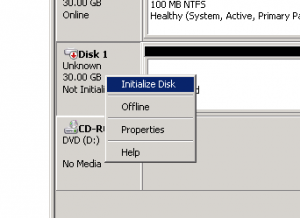
If you don’t automatically get prompted, and your second drive says “Not Initialized”, right click the drive you want to mirror to, and select “Initialize disk”.
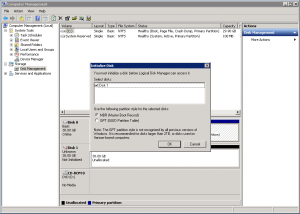
The Initialize disk screen should now appear.
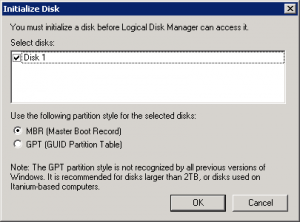
Select the partition style you want. I tend to sick with the “MBR” format.
Hit “OK” to Initialize the disk.
You should now have the second disk coming up as “Online”.
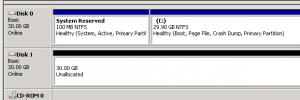
You will also note in the above screen shot, that both drives are set to “Basic”. To set up mirroring, they need to be set to dynamic.
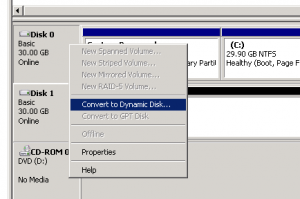
Right click either of the drives, and select “Convert to Dynamic Disk”.
You will then be asked which drives you want to convert to be dynamic.
Select all disks that you would like to convert. Since I only have two drives in this example, I will be ticking all available drives.
Select “OK” to bring up the confirmation screen.
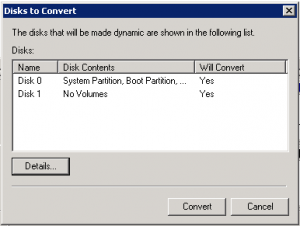
Once you have verified that these are the ones you cant to convert, hit “Convert” to start the process.
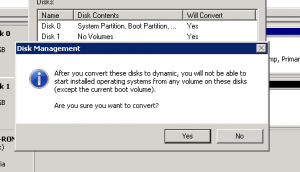
You will get another confirmation screen.Read this one and make sure you understand what its doing. If your second disk is blank, there wont be a operating system on there anyway. If you are dual booting on your main OS drive, you may need to check if that will be effected.
Hit “Yes” to this second confirmation to proceed and actually do the conversion.
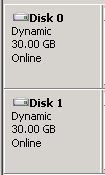
The disks should now appear to be both “Online” and “Dynamic”.
Now to actually create the mirror.
Creating the Mirror
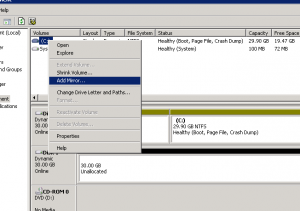
Right click the drive/partition you would like to mirror, and select “Add Mirror”. In this example, I will be mirroring C: drive.
You will be asked where you would like to set up the destination for the mirror. Select your second disk (in my case, labeled “Disk 1”).
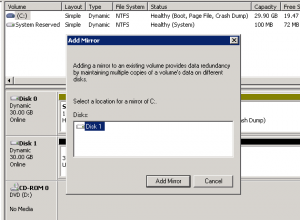
Press the “Add Mirror” button to start the mirror sync.
The two drives will now sync, and mirror everything from the source partition, to the second drive.
This can be seen by the “Resyncing” label on the partitions.

It should start to show the progress of the re-sync as a percentage as shown below.
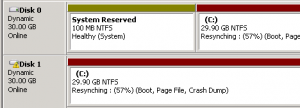
This process may take awhile. It would be a good idea to do this while no one is using the system.
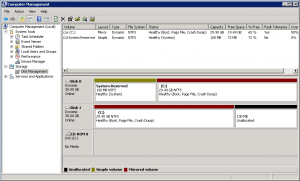
Once the re-sync completes, you should have two identical partitions on separate physical drives, constantly mirroring and keeping your data safe in the event of a hard drive failure.
Conclusion
While it is a simple process to create a mirrored volume, keep in mind that this (or any RAID technology) should not replace a good backup routine. If you delete any files on the mirrored drive, they will instantly be deleted on the other mirrored drive. Keep separate backups for these types of scenarios.

