

If your FreeBSD install is currently set up to obtain an IP address automatically via DHCP, and you want to change it to use a static IP, this article is for you. If you want to set up any sort of server on the machine, it is advisable to set up a static IP address.
The network interface address settings for FreeBSD are stored in the ‘/etc/rc.conf’ file and can manually be edited, however FreeBSD provides a nice GUI to modify this information easily.
Follow the steps below to set up FreeBSD to use a static IP address.
Note: These commands must be run from an account that has root privileges.
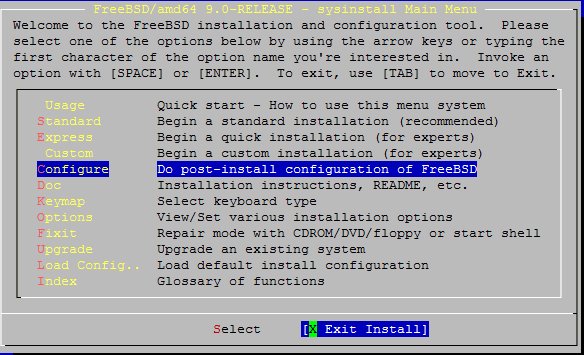
Run the ‘sysinstall’ command which will bring up the installation and configuration tool.
# sysinstall
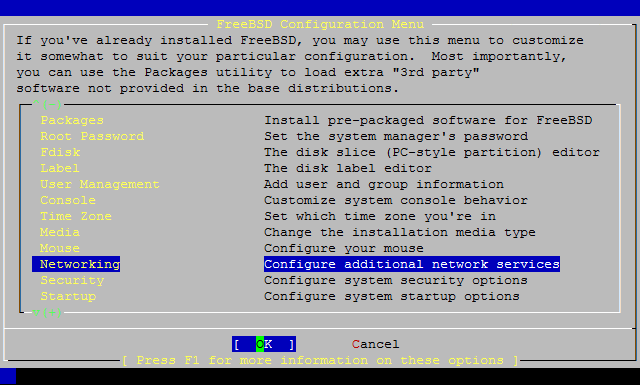
The main screen should look like the screenshot below.
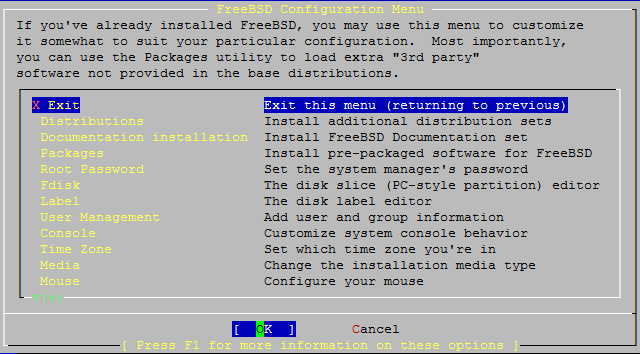
Scroll down to ‘Configure’ and press enter.

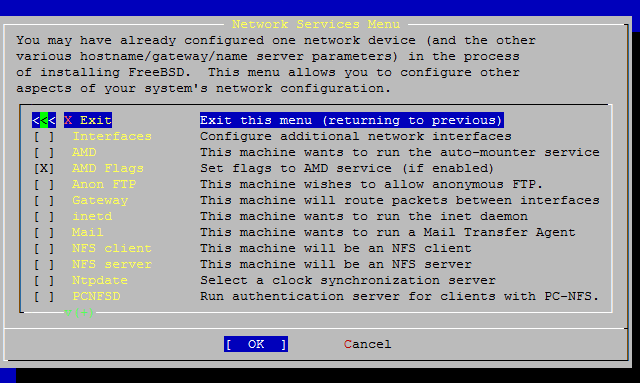
Scroll down the ‘Networking’ and press enter.
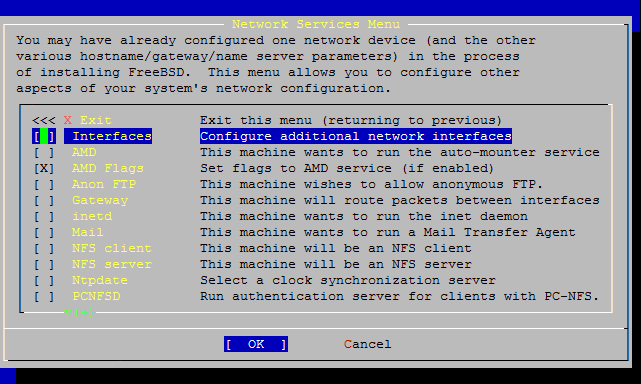
Select ‘Interfaces’ and press enter.
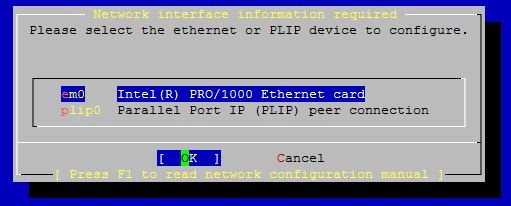
Select your network interface that you would like to set the IP address for (In this example, ’em0′).
You may get asked for IPv6 configuration. This guide will be focusing on IPv4, so I will be skipping the IPv6 configuration by selecting ‘No’.

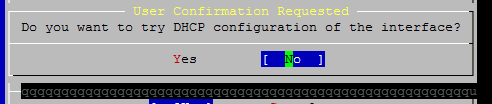
You will get a message asking if you would like to use DHCP for this interface. Make sure you select ‘No’ for this option.
You should now have the Network Configuration screen open, allowing you to tab through the various fields, and set ip the various network configuration properties such as IP address, host name, gateway, DNS server, etc.
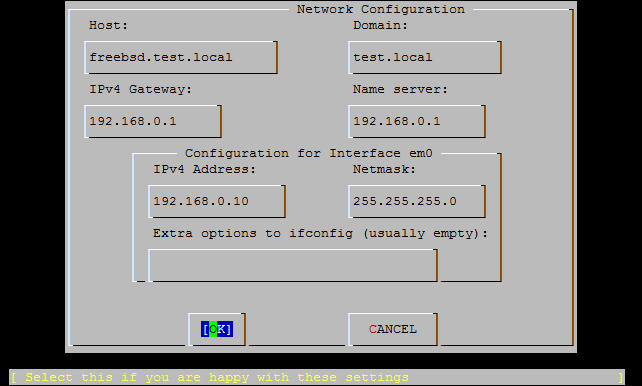
Once done, tab to the “OK” button and hit enter.
You will get a message asking if you would like to bring the interface up right away. Its probably already ‘up’, but you can click ‘Yes’ to this option.

Scroll back up to ‘Exit’ and hit enter to go back to the configuration menu.
Scroll back up to ‘Exit’ again and hit enter to return to the main menu.
Use the left and right arrow keys, and select the “Exit Install” button at the bottom, and press enter.
Run the ‘ifconfig’ command to check the status of the network interface.
# ifconfig
If the network interface still has the old IP address, restart networking using the following command:
# /etc/netstart
or if needed, reboot:
# reboot
Confirm that you now have the updated IP address set on the network interface.
If needed you can modify /etc/rc.conf manually to suit. The ‘sysinstall’ tool simply adds the configuration options you specified to the end of this file.